September 1, 2026
How to Refinish Stairs
- Why Is Refinishing Your Wood Stairs Worth It?
- How Do You Know Whether to Refinish or Replace Your Stairs?
- What Are the Steps to Refinish Wood Stairs?
- Which Stains and Finishes Are Best for High-Traffic Stairs?
- Should You Refinish Your Stairs Yourself or Hire a Professional?
- Why Choose a Professional for Staircase Refinishing?
Your staircase is far more than a simple functional structure designed to carry you from one floor of your home to another. It is the architectural spine of your house. It is often the very first visual element that greets you and your guests when the front door opens. A beautifully crafted, well-maintained staircase sets the tone for the entire interior design, anchoring the aesthetic of your home and radiating a sense of warmth, elegance, and permanence.
However, because stairs endure an incredible amount of foot traffic, they are uniquely vulnerable to wear and tear. Day after day, year after year, your stairs face the relentless friction of shoes, the scratching of pet claws, the impact of dropped items, and the gradual fading caused by sunlight streaming through nearby windows. The beautiful finish that once gleamed can slowly degrade into a dull, scratched, and lifeless surface. When this happens, many homeowners assume that a complete replacement or covering the wood with thick carpet are their only options. This is a misconception. If the underlying structure is sound, learning how to refinish stairs is the most rewarding, transformative, and value-adding project you can undertake.
Refinishing a staircase is a meticulous craft. It requires patience, an understanding of wood science, a steady hand, and a commitment to following a rigorous process. Whether you are uncovering century-old oak hidden beneath layers of outdated shag carpet or simply breathing new life into a faded finish from a decade ago, the journey from worn-out steps to a breathtaking focal point is deeply satisfying. In this comprehensive masterclass guide, we will explore every single facet of the refinishing process. From assessing the structural integrity of your steps to choosing the perfect chemical formulations for your topcoat, you will learn the industry secrets required to execute this project flawlessly.
Why Refinishing Your Wood Stairs is a Game Changer
When homeowners begin looking at interior upgrades, they often focus on kitchen remodels or bathroom overhauls. While those are excellent investments, the staircase is frequently overlooked, despite offering one of the highest returns on investment in the realm of home improvement. Restoring your wood stairs is a true game changer for several critical reasons, encompassing aesthetics, financial value, and overall home hygiene.
First and foremost is the undeniable visual impact. Wood stairs possess a timeless elegance that no synthetic carpet or laminate can truly replicate. Wood is an organic material, meaning every single tread has a unique grain pattern, a specific history, and a distinct character. When you strip away the old, yellowed polyurethane or peel back decades-old carpeting, you are revealing the raw beauty of nature. A freshly refinished staircase can instantly modernize a dated interior. For example, taking a staircase from a glossy, pale honey-oak finish synonymous with the 1990s and transforming it into a rich, matte espresso or a natural, clear-coated white oak finish completely alters the architectural language of the house. It brings the space into the present day without requiring demolition.
Financially, the decision to refinish rather than replace is incredibly astute. High-quality hardwoods like red oak, white oak, maple, and walnut are expensive commodities. If your home already possesses these materials in the form of a solid staircase, tearing them out to replace them with modern equivalents would cost an exorbitant amount of money. Refinishing allows you to leverage the expensive materials you already own. Furthermore, real estate experts consistently note that homes featuring authentic, well-maintained hardwood floors and staircases sell faster and command higher asking prices. Buyers equate hardwood with luxury, durability, and cleanliness.
This brings us to the aspect of indoor air quality and hygiene. Carpeting on stairs is notoriously difficult to keep clean. The corners where the tread meets the riser act as magnets for dust mites, pet dander, dirt, and allergens. Standard vacuums struggle to properly agitate and extract debris from these tight angles. By removing the carpet and refinishing the bare wood beneath, you instantly create a healthier living environment. Wood surfaces are hypoallergenic, exceptionally easy to sweep or wipe down, and do not harbor the microscopic pollutants that degrade indoor air quality.
Finally, refinishing your stairs grants you total creative control. You are not limited to the pre-finished options available at a big-box store. You have the freedom to mix custom stain colors to perfectly match your new luxury vinyl plank flooring in the hallway, or you can choose a striking contrast, such as ebony-stained treads paired with crisp white painted risers. The sheer versatility makes this project a designer’s dream.
Assessing the Damage: When to Refinish vs. Replace
Before you invest time, money, and physical energy into a refinishing project, you must conduct a thorough, clinical assessment of your staircase. Not every set of stairs is a candidate for a simple sanding and staining process. Understanding the anatomy of your staircase and identifying structural weaknesses versus cosmetic blemishes is the crucial first step.
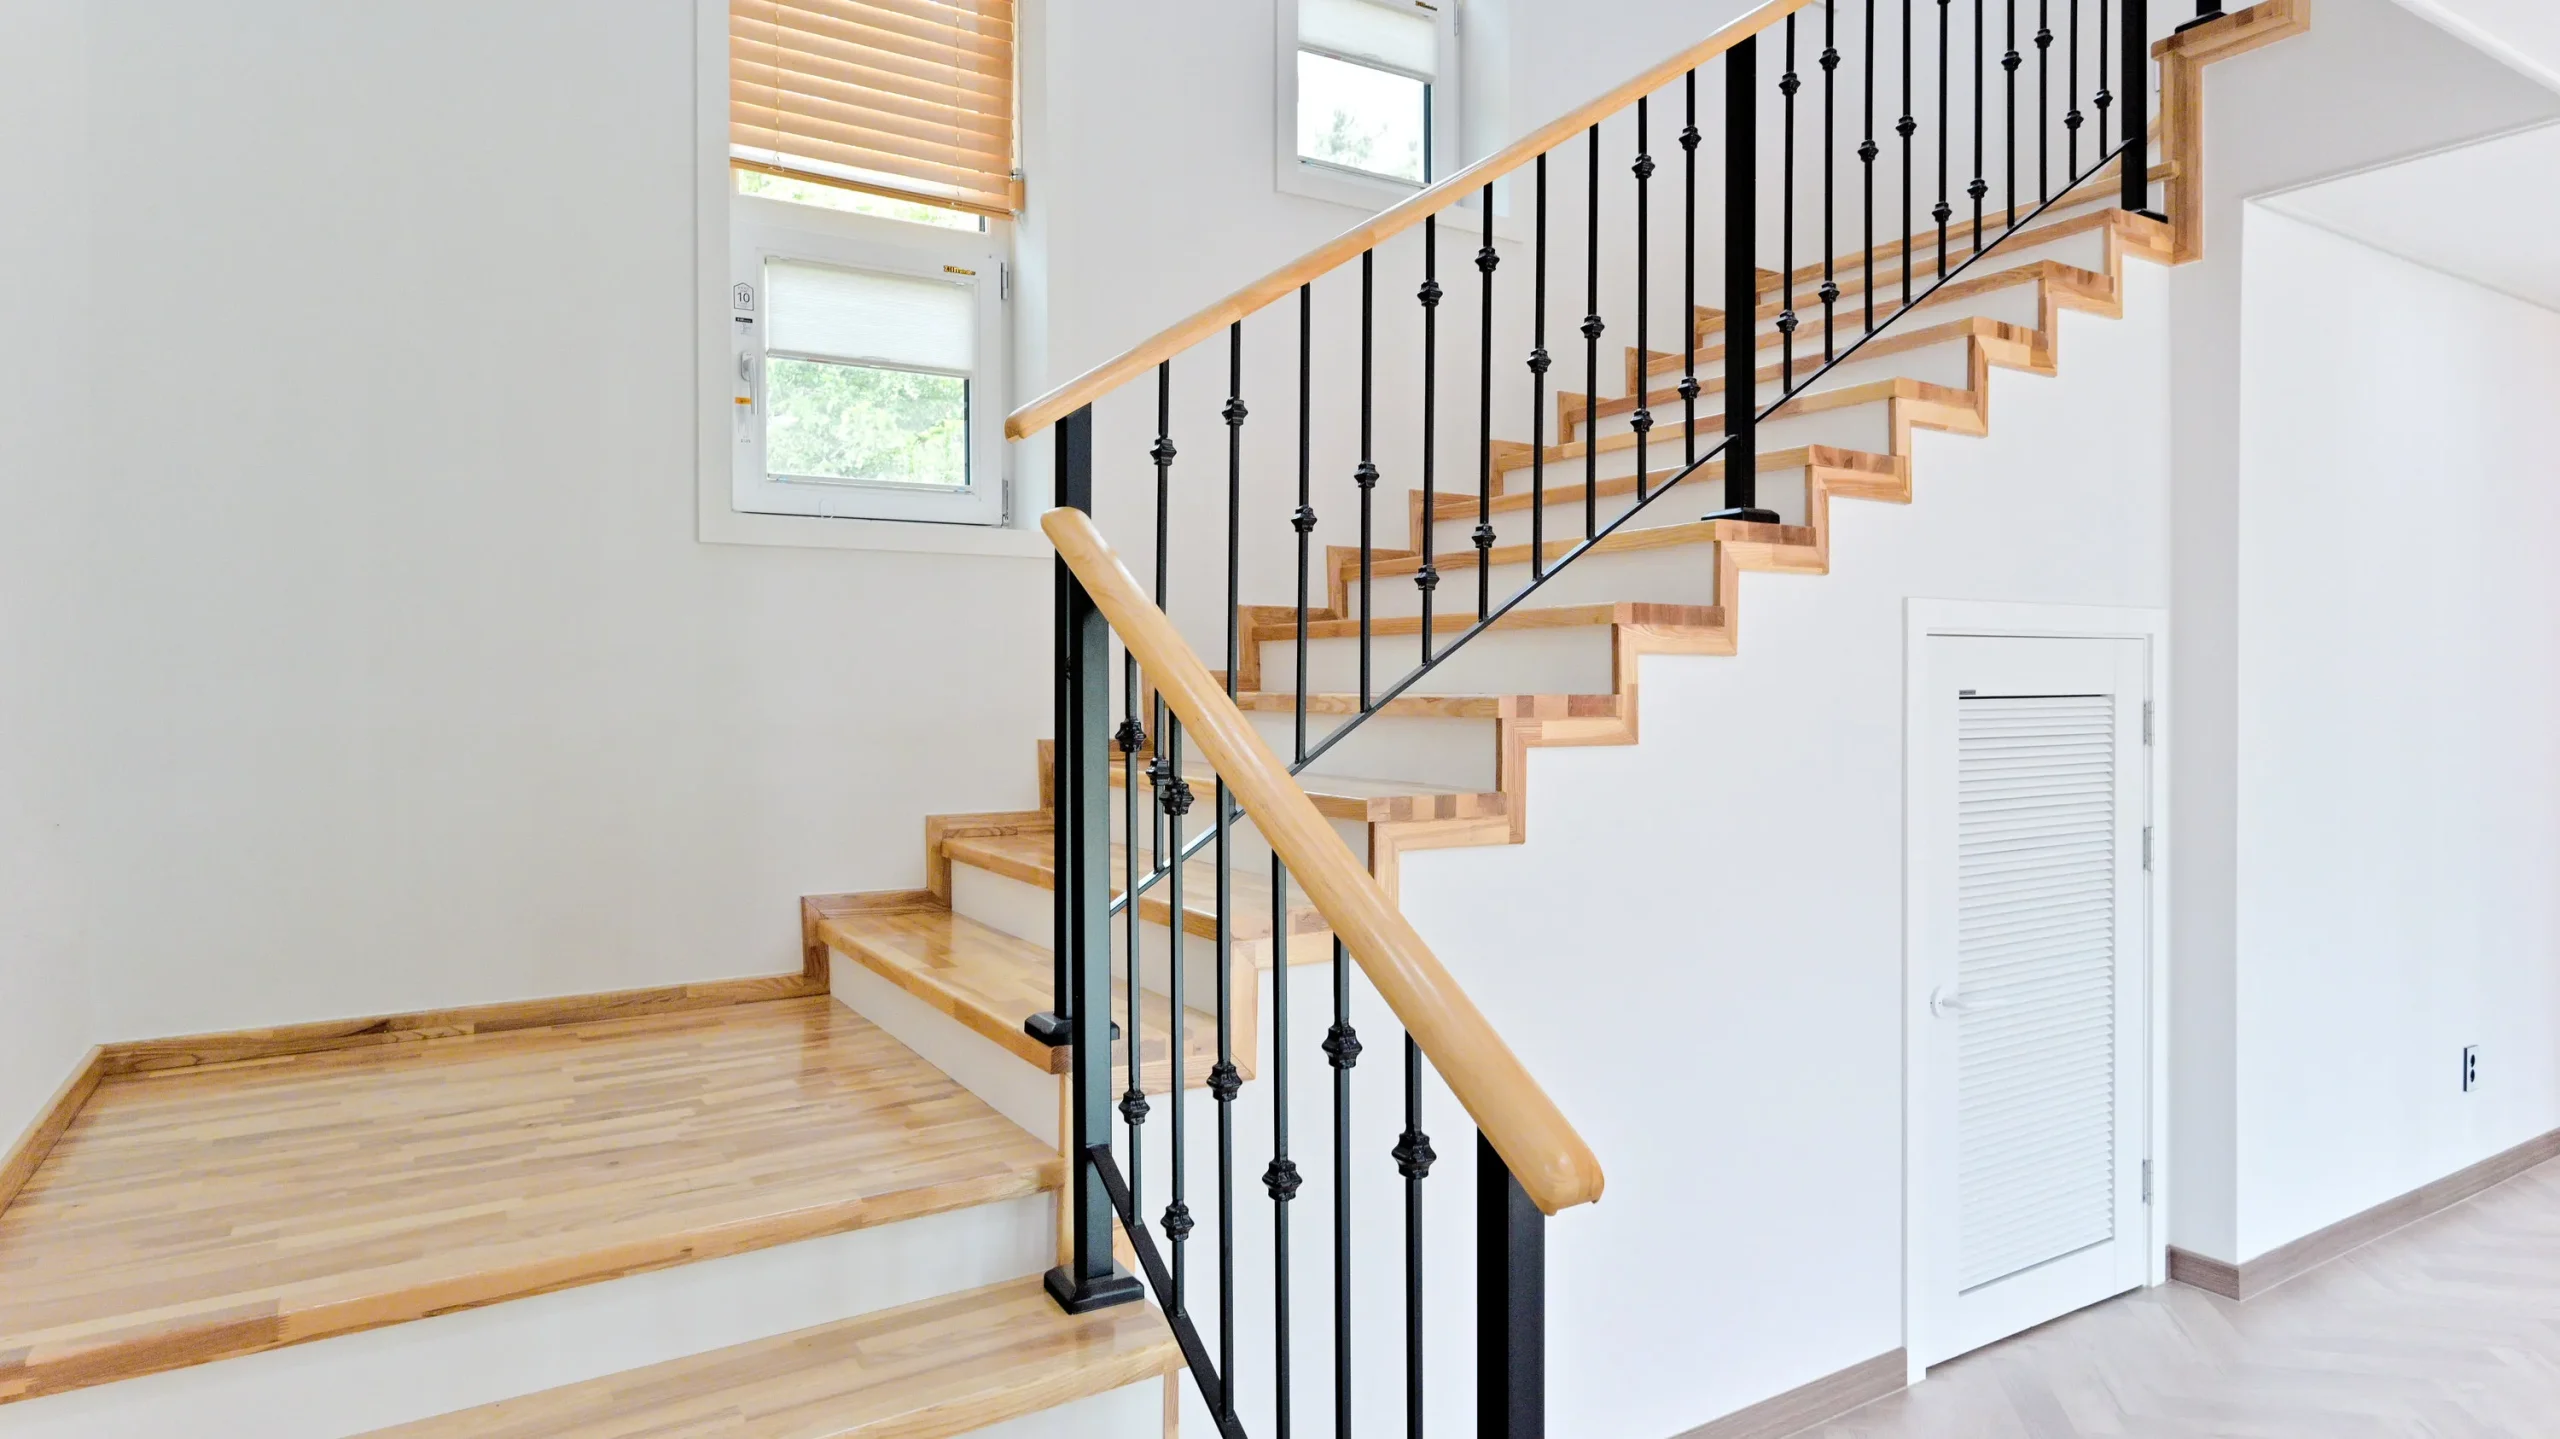
A standard staircase consists of several key components. The “tread” is the horizontal part you step on. The “riser” is the vertical board that connects the back of one tread to the front of the next. The “stringers” are the structural sawtooth-cut boards on the sides that support the treads and risers. The “nosing” is the rounded edge of the tread that overhangs the riser. Finally, you have the balustrade system, which includes the handrail, the vertical spindles (balusters), and the heavy structural posts at the bottom and top known as newel posts.
To begin your assessment, walk up and down the stairs slowly, placing your full weight on different sections of each tread. Listen carefully. Are there severe squeaks, groans, or shifting movements? A minor squeak can often be fixed by driving a few specialized breakaway screws into the joists or applying construction adhesive from beneath if the stairs are exposed. However, if the tread visibly bows under your weight or feels spongy, you may be dealing with a cracked tread or, worse, a failing stringer. Structural failures require carpentry work and replacement, not just a cosmetic refinishing.
Next, examine the surface of the wood. You are looking for the difference between surface wear and deep structural gouges. Surface wear includes scuff marks, faded stain, shallow scratches from dog claws, and worn-away polyurethane on the front edge of the nosing. All of these issues are perfectly suited for refinishing. The sanding process will easily erase these imperfections.
Conversely, you must be on the lookout for deep damage. If previous owners allowed heavy objects to drop on the stairs, there might be gouges that are a quarter-inch deep. Sanding out a gouge that deep would compromise the thickness and safety of the tread. In these cases, you might need to use a high-quality wood filler, though large patches of filler rarely take stain exactly like the surrounding wood. If a tread is severely split, deeply gouged, or warped due to water damage, that specific tread must be replaced before the refinishing process begins.
You must also identify the type of material you are working with. If you pull up the carpet and find construction-grade plywood, oriented strand board (OSB), or cheap pine heavily littered with knots, you cannot simply stain it and expect a premium look. Plywood cannot be sanded aggressively without burning through the thin top veneer. If your stairs are made of structural plywood originally intended to be hidden by carpet, you will need to install hardwood retro-fit treads (also known as false treads or stair overlays) directly over the existing structure.
Take a close look at your balusters and handrails. Refinishing spindles by hand is an incredibly tedious process because of the intricate curves and turnings. If your spindles are a dated, chunky 1980s style, it might be more cost-effective and aesthetically pleasing to completely replace them with sleek iron balusters or modern square wood spindles, rather than spending forty hours trying to strip and sand them.
The Step-by-Step Guide on How to Refinish Stairs
If your assessment confirms that your stairs are structurally sound and feature solid wood construction, you are ready to begin. The process of learning how to refinish stairs is broken down into distinct, critical phases. Skipping a step or rushing the process will inevitably result in a compromised finish.
Phase 1: Preparation and Demolition
The preparation phase is arguably the most important. If your stairs are currently carpeted, you must remove everything down to the bare wood. Start at the top of the staircase. Grab the corner of the carpet with heavy-duty pliers and pull firmly to detach it from the tack strips. Roll the carpet downward, cutting it into manageable sections with a utility knife as you go. Once the carpet and the underlying foam padding are removed, you will be faced with the most tedious task of the entire project: staple and tack strip removal.
Carpenters use hundreds of staples to secure stair runners. You must meticulously remove every single staple using needle-nose pliers or a specialized staple puller. If you leave even one broken staple embedded in the wood, it will tear the sandpaper on your expensive orbital sander and potentially gouge the wood during the next phase. Carefully pry up the wooden tack strips located at the back of each tread, being gentle so you do not splinter the wood of the tread itself.
Next, isolate your workspace. Sanding stairs generates an apocalyptic amount of fine dust that can easily infiltrate every room in your house, coating your furniture and infiltrating your HVAC system. Use thick plastic sheeting and painter’s tape to seal off doorways at the top and bottom of the staircase. Cover nearby light fixtures and artwork. If possible, set up a box fan in a nearby window pointing outward to create negative air pressure, drawing the dust outside.
Phase 2: The Stripping Process
If your stairs have a thick, gummy layer of old paint or many layers of dark varnish, jumping straight to sanding will simply melt the old finish and instantly clog your sandpaper. In these cases, a chemical stripper is highly recommended.
Apply a thick, generous layer of a high-quality, semi-paste wood stripper using a cheap chip brush. Do not over-brush the stripper, as it needs to form a thick film to work effectively. Leave the room and let the chemicals do the heavy lifting. Depending on the product, this can take anywhere from thirty minutes to several hours. Once the old finish has bubbled and wrinkled like alligator skin, use a plastic putty knife or a specialized contour scraper to gently scrape the sludge away. A plastic scraper is preferred because a metal blade can easily dig into the softened wood. Wipe down the sticky residue with mineral spirits and fine steel wool to neutralize the chemicals and prepare the surface for sanding.
Phase 3: The Masterclass in Sanding
Sanding is the great equalizer. It is where patience pays off and where rushing is punished. You will need a random orbital sander for the main flat surfaces of the treads, and a detail sander (often called a mouse sander) for the tight corners where the tread meets the riser and the stringer.
You must follow a strict progression of abrasive grits. Never skip a grit in the sequence. Start with a coarse 60-grit sandpaper. The goal of the 60-grit pass is to remove the remaining old finish, level out minor scratches, and expose the raw, fresh wood beneath. Move the sander slowly and methodically with the grain of the wood. Never push down hard on the sander. Let the weight of the machine and the sharpness of the abrasive do the work.
Once the entire staircase has been sanded with 60-grit, vacuum thoroughly. Now, move to 80-grit sandpaper. The purpose of the 80-grit pass is not to remove finish, but to remove the deep microscopic scratches left behind by the 60-grit paper. Repeat the process with 100-grit, and finally, finish with 120-grit. Stopping at 120-grit is generally the sweet spot for flooring and stairs. If you sand the wood too finely, say to 220-grit, you will actually burnish the wood fibers, closing the pores and preventing the stain from penetrating properly, which leads to a pale, uneven color.
For the edges, the corners, and the rounded nosing, you will likely need to rely on hand sanding using a sanding block. Wrap the sandpaper around a flexible sponge to curve around the bullnose of the tread perfectly.
Phase 4: Flawless Cleaning
Dust is the absolute enemy of a beautiful finish. Once the final sanding is complete, you must clean the stairs meticulously. Vacuum the stairs using a brush attachment, paying special attention to the deep crevices along the stringers. Once vacuumed, wipe down every single surface with a microfiber cloth lightly dampened with mineral spirits. Follow this up with a commercial tack cloth, which is a sticky cheesecloth designed to pick up the invisible micro-dust that vacuums leave behind. Run your bare hand over the wood. It should feel as smooth as glass, with absolutely no grit or residue.
Phase 5: Applying the Stain
Before applying your chosen stain, consider the wood species. If you are working with a softwood like pine, or a tight-grained wood like maple, they are notorious for absorbing stain unevenly, resulting in an ugly, blotchy appearance. To prevent this, you must apply a pre-stain wood conditioner. This liquid penetrates the softer parts of the grain, partially sealing them so the wood absorbs the colored stain uniformly.
Stir your stain thoroughly, bringing up all the heavy pigments resting at the bottom of the can. Never shake a can of stain or finish, as this introduces air bubbles that will ruin your work. Apply the stain using a natural bristle brush or a clean lint-free rag. Work on one tread at a time. Wipe the stain onto the wood, working it deep into the grain. Wait the manufacturer’s recommended time (usually between three to fifteen minutes), and then wipe off all the excess stain using a clean rag. The longer you leave the stain on, the darker and richer the color will be. However, you must never allow the stain to dry on the surface before wiping it off, as it will leave a sticky, muddy mess that the topcoat cannot adhere to. Let the stain dry completely, which usually takes 24 to 48 hours depending on humidity.
Phase 6: Sealing and Protecting
The final step is applying the protective topcoat. Given the extreme traffic stairs endure, a high-quality polyurethane is mandatory.
Apply the polyurethane using a synthetic bristle brush for water-based formulas, or a natural bristle brush for oil-based formulas. Brush with the grain in long, smooth, continuous strokes. Do not over-brush or over-work the finish, as this introduces bubbles.
You will need a minimum of three coats for a staircase. After the first coat dries, it is completely normal for the stairs to feel rough to the touch. This phenomenon is called “grain raise,” where the liquid causes the microscopic wood fibers to swell and stand up. You must knock this down by lightly hand-sanding the entire staircase with 220-grit sandpaper until it feels smooth again. Vacuum, use a tack cloth, and apply the second coat. Repeat the light sanding process before applying the final, third coat.
Choosing the Right Stains and Finishes for High Traffic
The chemistry of the products you choose will dictate the longevity, appearance, and maintenance requirements of your staircase for the next decade. Understanding the nuances of different stains and protective finishes is a hallmark of professional craftsmanship.
Let us begin with the stain. Penetrating oil-based stains are the industry standard. They offer a long open time, meaning they do not dry too quickly, allowing you plenty of time to wipe off the excess without leaving lap marks. They penetrate deeply into the pores of woods like red oak and white oak, highlighting the beautiful natural grain patterns. Gel stains are an alternative worth considering if you are working with difficult woods like maple or pine, or if you are trying to drastically darken an already finished surface without stripping it entirely. Gel stains sit on top of the wood rather than soaking in, acting almost like a translucent paint.
The most critical decision, however, lies in your choice of topcoat. You generally have two primary options: oil-based polyurethane and water-based polyurethane.
Oil-based polyurethane is the traditional choice. It is incredibly durable, highly resistant to scratching, and forms a hard, protective shell over the wood. A key characteristic of oil-based poly is that it imparts a warm, amber glow to the wood. Over the years, exposure to UV light will cause this finish to amber even further, turning slightly yellow or orange. If you are staining your stairs a dark espresso, cherry, or a warm chestnut, this ambering effect is perfectly fine and often enhances the depth of the color. However, oil-based polyurethane has significant drawbacks. It has an extraordinarily strong chemical odor caused by high levels of Volatile Organic Compounds (VOCs), requiring you to ventilate the house for days. Furthermore, it takes exceptionally long to dry. You might have to wait up to twenty-four hours between coats, meaning your staircase will be completely out of commission for almost a week.
Water-based polyurethane has advanced exponentially in recent years and is now the preferred choice for many professionals. High-end water-based finishes, particularly those infused with aluminum oxide, rival oil-based products in durability. The major advantages of water-based polyurethane are clear. First, it dries crystal clear and remains clear forever. It will never yellow or amber over time. This makes it the absolute only choice if you are doing a whitewashed look, a gray stain, or if you want to preserve the raw, pale, natural look of white oak. Second, it dries incredibly fast. You can often apply three coats in a single day, drastically reducing the time your staircase is unusable. Finally, the VOC levels are drastically lower, meaning the odor is minimal and perfectly safe for homes with children and pets.
When selecting the sheen level, avoid high-gloss finishes for stairs. Gloss reflects light perfectly, meaning every single speck of dust, every dog hair, and every microscopic scratch will be highlighted like a neon sign. Furthermore, gloss finishes can be dangerously slippery in socks. Instead, opt for a satin or a matte finish. These lower sheens hide dust and footprints exceptionally well, provide slightly more traction, and offer a modern, sophisticated aesthetic that aligns with current interior design trends.
DIY vs. Professional Help for Your Staircase Project
Reading through a step-by-step guide can make the process seem straightforward, inspiring a surge of DIY enthusiasm. Countless homeowners watch a quick online tutorial and assume they can tackle their staircase over a long holiday weekend. However, the reality of refinishing stairs is far more complex, physically exhausting, and technically demanding than most anticipate. It is vital to weigh the pros and cons of doing it yourself versus hiring a professional.
The primary motivation for the DIY route is cost savings. By providing your own labor, you are only paying for the raw materials, sandpaper, and equipment rentals. If you possess a high degree of patience, have experience with woodworking tools, and are willing to dedicate several full days of back-breaking labor, it can be a highly rewarding endeavor.
However, the hidden costs of DIY often catch homeowners off guard. Renting professional-grade tools adds up quickly. If you make a mistake during the sanding phase, such as leaving deep swirl marks with the edger or burning through the veneer, the damage is permanent and will be glaringly obvious once the dark stain is applied. Furthermore, the sheer physical toll cannot be overstated. You will spend hours on your hands and knees, contorted in tight angles, inhaling dust despite wearing a respirator.
Dust containment is perhaps the biggest failure of the DIY approach. Professional floor refinishers use sophisticated, expensive dust-containment systems attached directly to their sanders, utilizing HEPA vacuums that capture 99% of the particulate matter before it ever hits the air. A DIYer with a shop vacuum simply cannot replicate this. Without proper mitigation, fine wood dust will settle into your carpets, your air ducts, and your electronics for months to come.
Finally, consider the logistics of your home. A staircase is an essential artery. While it is being refinished, access to the upper level of your home is completely cut off. A professional crew can execute the job with speed and precision, minimizing downtime. A DIY project that hits a snag can leave your family sleeping on the downstairs sofa for two weeks.
If you begin to feel that the complexities of chemical strippers, the physics of abrasive grits, and the nightmare of dust containment are overwhelming, it is time to turn to a search engine. Typing in staircase remodel near me is the best first step to saving yourself immense frustration. Local professionals have the muscle memory, the high-tech equipment, and the nuanced understanding of wood behavior to execute the job flawlessly. They know exactly how to handle the tricky balusters, how to mix custom stains to match your existing floors, and how to apply finishes without leaving a single brush stroke or bubble.
Partnering with Budomax Construction for Flawless Results
When you reach the conclusion that a project of this magnitude requires the touch of a seasoned expert, choosing the right contractor becomes your most important decision. You do not want a general handyman attempting this highly specialized craft. You need a dedicated team of master carpenters and flooring specialists who view a staircase not just as a walking surface, but as a piece of fine furniture.
If you are looking for top-tier staircase renovation in Hoffman Estates, there is one name that stands out above the rest. Partnering with Budomax Construction guarantees a seamless, stress-free transformation of your home’s most prominent architectural feature.
The team at Budomax Construction brings years of hyper-focused expertise to every single project. They understand that every home is unique, and they do not believe in a one-size-fits-all approach. When they step into your home for a consultation, they conduct a rigorous structural analysis of your stairs. They will advise you honestly on whether your existing treads can be gorgeously restored through sanding, or if your specific situation requires custom-milled overlay treads.
What truly sets them apart is their commitment to cleanliness and precision. They utilize state-of-the-art dust extraction technology, ensuring that your home remains spotless while the heavy sanding takes place. Their craftsmen possess an encyclopedic knowledge of wood species and chemical finishes, allowing them to perfectly color-match your new stairs to your existing hardwood or luxury vinyl floors. From the initial demolition of your old, dusty carpet to the final, flawless coat of premium polyurethane, their attention to detail is uncompromising.
Refinishing a staircase is a massive undertaking, but it yields one of the most stunning visual transformations possible in residential remodeling. Whether you choose to take on the physical challenge yourself or trust the proven professionals at Budomax Construction to handle the heavy lifting, giving your staircase the attention it deserves will fundamentally elevate the beauty, value, and character of your entire home.